How to Create a GL Account
General Ledger Accounts are used to record the system’s financial transactions. Typically, these correspond with GL Accounts in your agency’s main financial system.
1. Once you’ve logged in to MyCommunityHub using your agency account, click Administration in the top bar.

2. In the Financial section, click GL Accounts

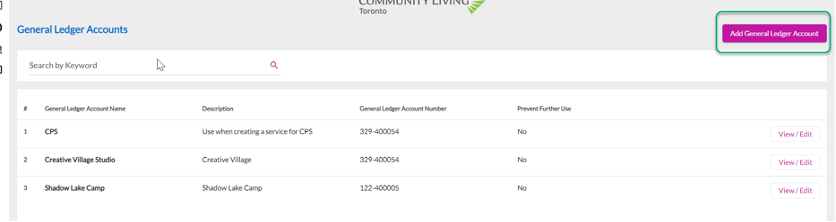
3. You will be taken to a page with all existing GL accounts. Click the purple Add New in the top right-hand corner.
4. There will be a popup window where you can enter all GL account details.
- GL Account Name should start with your agency name or initials, followed by a dash “-”, and then the account name. For example, “GCA – Summer Camp”
- Description of GL Account is optional. This can include any extra details about the GL account.
- Select Account Type. There are two types of Account Type. Income is the default and is the account type that should be selected for all services. Income means that money will be coming into the account. Liability is the other type of GL account and will be the type of GL account that should be used for coupons.
- GL Account Number is the number assigned to the GL account. There are no repeat GL Account Numbers allowed in the system.
- Allow debit to offset customer credit should be set to Yes. This allows the GL account to create “Credit on Account” for customers if necessary.
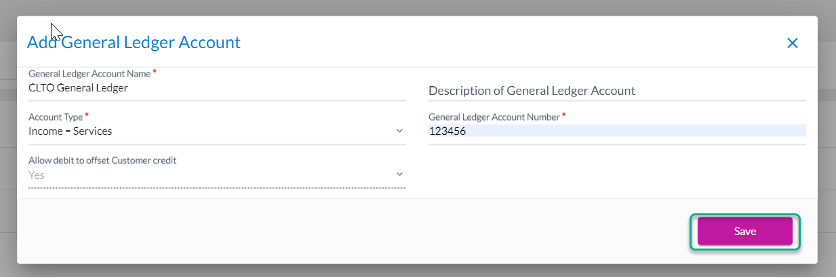
5. When all mandatory fields are completed, the Save button should become purple. Click Save to add the GL account to the list.
6. Once you click Save, you will be at the GL account list and your new GL will be in the list.
7. The GL account can be added to any service you create. Please see our article on Creating a Service for steps on how to add the GL account to your service.